Exercise Lesson 9: Adding Videos to Your Slide
Instructions
Below are a few exercises to help you practice. Follow instructions carefully. A sample slide is shown to help you understand how your final outcome should look.
- Using your current presentation, create a new slide.
- Change the layout to the Blank Template so that there is nothing on your slide.
- Insert a short video onto your slide.
- Set it to play only when clicked. Re-size your video box so that it is at the center of the page.
- Under the video, insert a textbox.
- Inside the textbox type, “This video is relevant to my topic because of certain reasons”.
- Change the font of your text to Times New Roman, size 20.
- Change the textbox fill to black.
- Change the text color to green.
- Above the video, insert another textbox.
- Here, type “Video Slide”.
- Change the font of your text to Times New Roman, size 44.
- Change the textbox fill to black.
- Change the text color to orange.
- Align the text to the center.
- Preview your video to see whether or not it works.
- Save your changes by using the Quick Access Toolbar
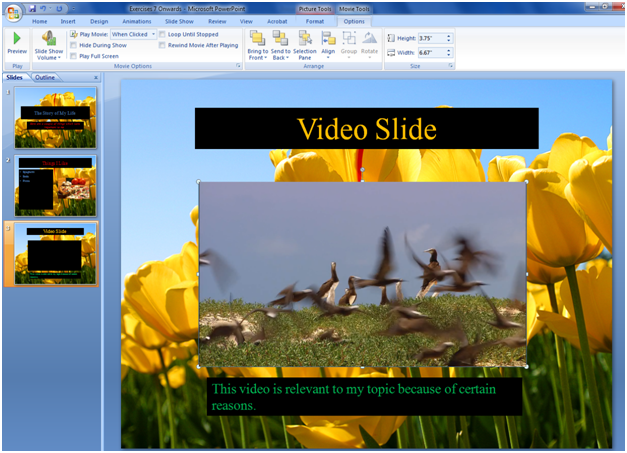
Upon completion of the 16th step, your third slide should look like this:

In this exercise, we were able to practice inserting videos into slides. We were also able to practice re-sizing them. In addition to this, we were able to practice inserting and editing text; we were also able to see how this can complement a video in PowerPoint presentations.
 + 1-888-827-0150
 + 44-20-3006-2750


